How to Organize Links by Space: Simple Beginner Guide
Ready to get started?
Join thousands of users who are already using our platform to manage their links efficiently.
Create Your Free AccountIn our hyper-connected digital lives, we’re all drowning in links, aren't we? We’re constantly sharing them, tracking their performance, and trying our best to manage what feels like an endless stream of URLs. Whether you’re crafting a dazzling marketing campaign, curating essential educational resources, collaborating on internal projects, or just trying to keep your favorite articles from vanishing into the ether, the sheer volume can quickly become… well, a complete nightmare. Seriously, imagine trying to hunt down that one specific shortened link from months ago, buried deep within a sprawling list of hundreds. Sound familiar? Frustrating doesn’t even begin to cover it!
Here’s the thing: effective link organization isn't just a nice little perk anymore; it’s an absolute necessity. Especially for those of us just stepping into the wild world of link management, getting things tidy right from the get-go can save you countless hours of head-scratching and major headaches down the road. And guess what? One of the most powerful, yet wonderfully simple, ways to achieve this digital zen is through something called Spaces.
In this super practical guide, we’re going to walk you through every single thing you need to know about organizing your precious links using Spaces. We’ll break down exactly what Spaces are, how they function, and give you clear, step-by-step instructions so you can immediately harness this organizational superpower. Get ready to kiss your cluttered link dashboard goodbye and transform it into a streamlined, hyper-efficient hub!
Prerequisites: What You'll Need to Dive In
Before we embark on our journey into the magic of Spaces, there are just a couple of super basic things you’ll need to have in place. Don’t worry, we’re talking really simple stuff here!
- A URL Shortening Account: This one's pretty obvious, right? To organize shortened links, you first need a platform that lets you create them. Most modern URL shortening services offer some form of organizational features. For the purpose of this guide, we'll assume you’re using a robust platform that provides excellent Space functionality, making your life much easier.
- Links to Organize: You’ll need some existing shortened links, or at least be ready to create a few new ones, that you want to group together. If you're just starting out, even a handful of links related to a single project or topic will be absolutely perfect for practicing and getting a feel for the system.
It doesn't matter if you only have a few links right now. Developing solid organizational habits early on will pay off immensely as your link library inevitably grows. Think of it as investing in your future sanity!
Step-by-Step Instructions: Mastering Link Organization with Spaces
Alright, enough theory! Let’s get practical. Here’s a detailed, easy-to-follow walkthrough on how you can start using Spaces to keep your links perfectly organized, making your digital life so much smoother.
What Exactly is a "Space," Anyway?
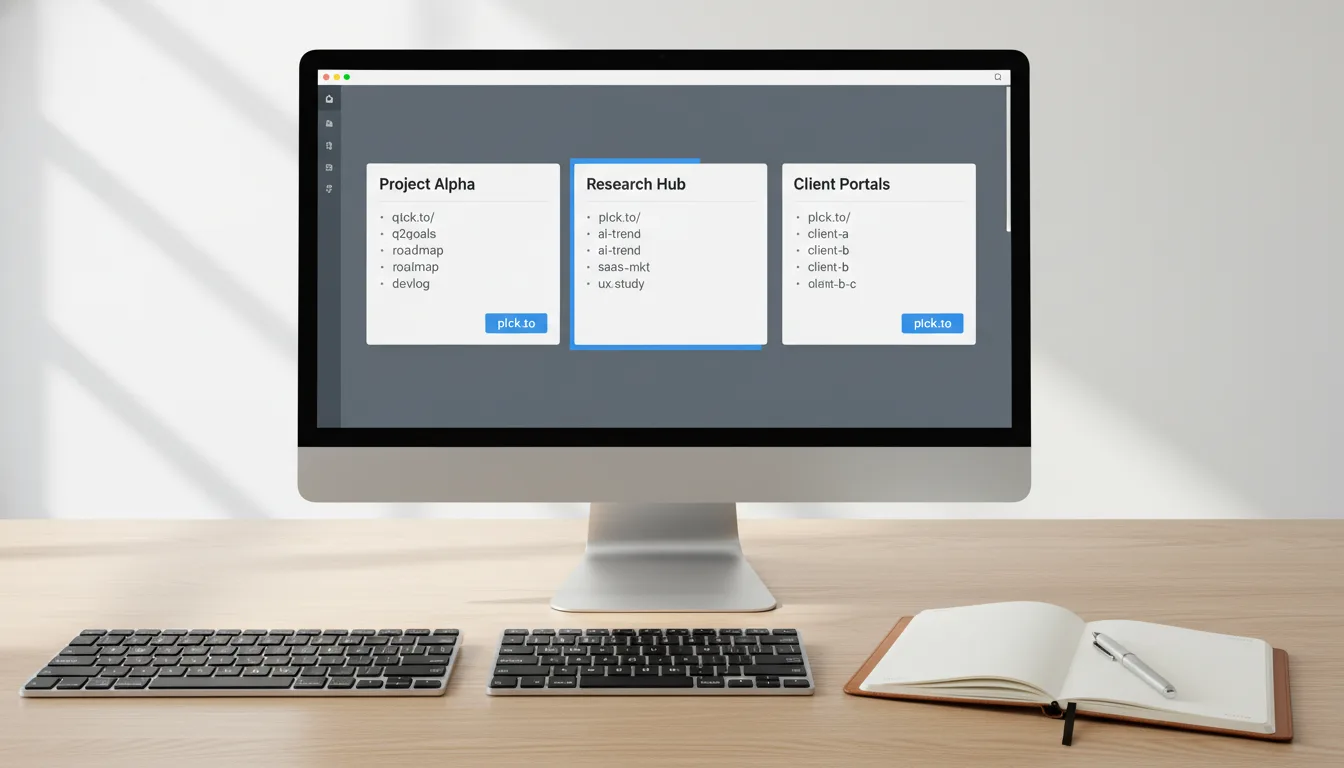
Imagine your entire collection of shortened links. Now, instead of having them all jumbled up in one gigantic, messy pile, picture a Space as a beautifully organized digital folder. It’s like creating separate, clearly labeled folders for all your different projects, marketing campaigns, individual clients, company departments, or even just your personal interests. Each Space acts as its own neat, isolated environment where you can manage links that are specific and relevant only to that particular category. No more cross-contamination or endless scrolling!
Seriously, take a moment to name your Spaces clearly and descriptively. Instead of something vague like "Project 1," aim for "Q3 Marketing Campaign - Product Launch" or "Client X - Social Media Links." Future you will thank you profusely!
Why Are Spaces So Incredibly Useful? (The Benefits!)
Understanding the "why" behind a tool often makes the "how" stick much better. So, let’s dive into the fantastic benefits you’ll reap by embracing Spaces:
- Improved Clarity: This is huge. You’ll instantly see which links belong to which initiative without having to pore over every single link description. It’s like having a perfectly organized filing cabinet instead of a digital junk drawer.
- Faster Navigation: Need to quickly grab all the links for your latest email campaign? No problem! Simply filter your dashboard by that specific Space, and *poof* – all relevant links appear immediately. Talk about a time-saver.
- Enhanced Collaboration: If you're working with a team, Spaces become an absolute game-changer. Different team members can manage their specific sets of links for their projects without accidentally stepping on anyone else’s toes or creating chaos in a shared dashboard.
- Better Reporting & Analytics: Many platforms allow you to view detailed analytics and performance metrics *per Space*. This means you get incredibly valuable insights into how an entire project or campaign is performing, not just individual links. Hello, smarter decision-making!
- Reduced Errors: Fewer links jumbled together in one place means less clutter. Less clutter, in turn, significantly reduces the chance of you accidentally editing the wrong link, deleting something crucial, or making a mistake that could impact your work.
Before I discovered Spaces, my link dashboard was a digital nightmare – a true junk drawer. Now, everything is so neatly categorized and easy to find, it’s genuinely saving me hours every single week!
Step 1: Creating Your Very First Space
Let's get down to business and create a Space for your current big project. While the exact button clicks might vary ever so slightly depending on which URL shortening platform you're using, the general process is incredibly similar across the board. You've got this!
- Log In: First things first, head over to your URL shortening dashboard.
- Find "Spaces" (or similar): Keep an eye out for a section in your navigation menu, sidebar, or dashboard settings that clearly says "Spaces," "Workspaces," or sometimes even "Teams" (if this feature is integrated with team collaboration).
- Click "Create New Space" or "+ Add Space": This button is usually quite prominent and easy to spot. Go ahead and click it!
- Name Your Space: Now for the important part – give your new Space a name that is both clear and descriptive. Something like "Q4 Product Launch" or "Blog Content - October" works perfectly. Remember our tip about descriptive names!
- Save/Confirm: Finally, click "Save," "Create," or "Confirm" to finalize your brand-new Space. You’re almost there!
Boom! You've just created your very first organizational hub. How great does that feel? Now, all your related links finally have a proper, tidy home.
Step 2: Adding Links to a Space
Now that you’ve got your shiny new Space, it’s time to start populating it with links. You’ve got two primary methods for doing this, both equally straightforward:
Method A: Creating a New Link Directly within a Space
This is probably the most intuitive way to manage your links from the get-go.
- Select the Space: Before you even think about shortening a new URL, make absolutely sure you’ve selected the correct Space from your dashboard's dropdown menu or sidebar. Many platforms allow you to easily switch your active Space.
- Shorten Your URL: Paste your long, unwieldy URL into the shortening field, just as you normally would.
- Customize (Optional but Recommended): This is your chance to add a custom back-half (like planck.to/new-product-guide), a helpful description, or even some tags to make it even more searchable later.
- Confirm Space: Give it one last glance! Double-check that the link is indeed being created within your desired Space. It should automatically default to the Space you currently have selected.
- Create Link: Hit that "Shorten" or "Create Link" button. And just like that, you’re done!
Your brand-new shortened link (for example, planck.to/q4launch-blog) will now comfortably reside in your chosen Space, ready for action.
Method B: Moving Existing Links to a Space
What if you’ve already got a bunch of links floating around that aren’t in a Space yet? No problem at all! You can easily move them.
- Go to All Links: Navigate to your main "All Links" view on your dashboard. This is usually where all your links live by default.
- Select Link(s): Find the link or links you want to relocate. Most platforms are smart enough to let you select multiple links using convenient checkboxes – a real time-saver if you’re moving a batch.
- Look for "Move to Space" or "Assign Space": After you’ve selected your links, a "Bulk Actions" menu or a "More Options" dropdown will typically pop up. Click on an option that sounds like "Move to Space," "Assign Space," or "Edit Space."
- Choose Target Space: From the dropdown list that appears, simply select the Space where you want to move your selected link(s).
- Confirm: Give it the final go-ahead by clicking "Apply," "Move," or "Save Changes." And just like that, your links are sorted!
Step 3: Filtering and Viewing Links by Space
This is where the true, glorious power of Spaces really shines through! Once your links are nestled neatly within their respective Spaces, viewing and accessing them becomes absolutely effortless – almost magical, really.
- Locate Space Selector: On your main dashboard or "All Links" page, cast your eyes around for a dropdown menu or a sidebar section that clearly lists all your beautifully named Spaces.
- Select Desired Space: Simply click on the name of the Space you want to view – for instance, "Client Website Redesign."
- View Filtered Links: Watch in awe as your dashboard instantly updates, showing you ONLY the links that are associated with that particular Space. No more distractions, just pure focus!
Filtering by Space lets you zero in on specific projects without any extraneous clutter or distractions. This makes managing your links and analyzing their performance incredibly more efficient and frankly, a lot less stressful.
Practical Examples: Seeing Spaces in Action
Sometimes, seeing is believing, right? To help you truly visualize just how powerfully versatile Spaces can be, let’s explore a few real-world scenarios. You might even find yourself in one of these!
Example 1: The Savvy Digital Marketer
Meet Sarah, a digital marketer juggling multiple campaigns at once for various clients and internal initiatives. Her links used to be all over the place!
- Space 1: "Client A - Summer Sale 2024" (This Space neatly contains all links related to this specific client's summer sale, like the email campaign link planck.to/clientA-sale-email and their social media ad links such as planck.to/clientA-sale-ad).
- Space 2: "Client B - New Product Launch" (Here, Sarah keeps everything for Client B’s big launch, including pre-order pages like planck.to/clientB-preorder and links to their press kit at planck.to/clientB-presskit).
- Space 3: "Internal Blog Promotion" (For promoting her own company’s blog content, she has links for new articles, like her latest SEO guide at planck.to/blog-seo-guide).
Now, by simply selecting a Space, Sarah can instantly see all the relevant links and their performance analytics for a particular campaign or client. No more mixing up Client A’s data with Client B’s!
Example 2: The Dedicated Educator or Researcher
Consider Professor Miller, an educator compiling resources for different courses, or Dr. Chen, a researcher meticulously managing sources for various academic papers.
- Space 1: "Spring Semester - Intro to Marketing" (This Space holds all the links crucial for her marketing course – lectures, assigned readings, and even submission links, like planck.to/mktg-lecture1 and planck.to/mktg-readch3).
- Space 2: "Research Project - AI Ethics" (For Dr. Chen's deep dive into AI ethics, this Space contains all her articles and datasets, such as planck.to/ai-ethics-paper1 and the dataset for AI bias at planck.to/dataset-ai-bias).
This clean separation keeps course materials distinctly separate from research materials, preventing any mix-ups and allowing for incredibly easy sharing of only the most relevant content with students or collaborators.
Example 3: The Busy Small Business Owner
Finally, let's look at Mark, a small business owner who’s responsible for his website, social media, and customer support. His link management used to be a free-for-all.
- Space 1: "Website & SEO" (Mark uses this for all his critical website links, including key landing pages and product pages like planck.to/homepage and planck.to/product-b for Product B).
- Space 2: "Social Media Posts" (This is where all his social links live, ready to go for Facebook, Instagram, and more, such as his latest Facebook promo planck.to/fb-promo and Instagram story link planck.to/ig-story-link).
- Space 3: "Customer Support Resources" (For swift customer service, Mark keeps links to his FAQ page planck.to/faq-page and his returns policy planck.to/returns-policy).
This organized structure helps Mark quickly grab the exact correct link for any context – whether he's responding to a customer query, drafting a new social post, or updating his website. It’s all right there, neatly categorized!
Common Mistakes to Steer Clear Of
While Spaces are wonderfully straightforward, even the best of us can stumble. Here are a few common pitfalls that beginners sometimes encounter. Knowing these ahead of time can help you build an even more robust system!
- Too Many Spaces: This might sound counter-intuitive, but creating a separate Space for every single tiny detail or minute difference can actually lead to its own form of disorganization. It makes filtering cumbersome and can feel just as cluttered as having no Spaces at all! Aim for broader, logical categories that truly make sense for your workflow.
- Too Few Spaces: On the flip side, having only one or two generic Spaces (like "General" or "Other") completely defeats the purpose of the feature. You won’t get the clarity or efficiency benefits. Strive for that sweet spot – a balance that provides meaningful segmentation without overwhelming you.
- Inconsistent Naming: Imagine trying to find something when you’ve named one Space "Project A," another "Client X Stuff," and then another "Marketing Q1 Campaign." It’s a mess! Establish a consistent naming convention right from the start (e.g., "Client Name - Project Title," or "Department - Quarter Campaign"). This uniformity is a lifesaver.
- Forgetting to Assign: It happens! You create a new link in a hurry and forget to assign it to a Space, or you neglect to move older, uncategorized links. This will inevitably lead to a messy "uncategorized" section that grows larger and larger. Make Space assignment a routine step in your link creation and management process.
- Overlapping Categories: Try your best to keep your Spaces distinct and mutually exclusive. If you find a link could logically fit into two different Spaces, it might be a sign that your Space structure needs a little refining. Perhaps one Space could be a sub-category of another, or your main categories need to be slightly rethought for better clarity.
Remember that your organizational needs aren't static. It's a great idea to periodically review your Space structure. As your projects evolve, you might discover that merging, splitting, or simply renaming existing Spaces can greatly improve your overall organization. Don't be afraid to adapt!
Troubleshooting Basic Space Issues
Even with the best intentions, you might run into a minor snag here and there. Don’t panic! These are usually super easy to fix. Here are some quick solutions for common beginner issues you might encounter:
- "My links aren't showing up in the Space I selected!"
- Solution: First, double-check that you actively selected the correct Space using the filter or dropdown menu. Sometimes, if you navigate away and come back, the filter might reset to "All Links." Also, take a moment to ensure that the links were actually properly assigned or moved to that specific Space in the first place. You can usually find them in your "All Links" view if they're not in the Space you expect.
- "Oops, I accidentally put a link in the wrong Space."
- Solution: No worries at all! This is a super common, easy fix. Just navigate to the Space where the link currently resides, select the link (or multiple links), and then use the "Move to Space" or "Edit Link" option to easily reassign it to the correct Space. Phew!
- "I can't find the 'Spaces' feature on my dashboard anywhere."
- Solution: It’s possible your platform uses slightly different terminology! Look for similar terms like "Workspaces," "Projects," or even "Teams." The feature might also be tucked away in a different part of the interface, perhaps within your account settings or profile menu. If you’re still stuck, a quick glance at your platform's help documentation or a search of their FAQs should point you in the right direction.
Conclusion: Embrace the Power of Organized Links (Your Future Self Will Thank You!)
There you have it! Organizing your shortened links using Spaces isn’t just a fancy trick; it’s genuinely one of the most effective ways to maintain clarity, supercharge your efficiency, and dramatically improve your entire link management experience. As a beginner, adopting this smart practice early on will absolutely set you up for massive success, ensuring you’re always in complete control of your valuable digital assets. Think of it as laying the foundation for a much less stressful digital life.
Imagine this: No more endless, mind-numbing scrolling through a chaotic list. No more frantic, last-minute searching for that one crucial link you absolutely need right now. With a well-structured, intuitive system of Spaces, you’ll know exactly where everything is, precisely when you need it. It’s like having a personal librarian for all your links! So, what are you waiting for? Take these practical steps, create your very first Space today, and start building a beautifully organized, perfectly accessible link library. Trust me, your future self – the one who's crushing deadlines and effortlessly sharing links – will absolutely thank you for it!
Ready to get started?
Join thousands of users who are already using our platform to manage their links efficiently.
Create Your Free Account